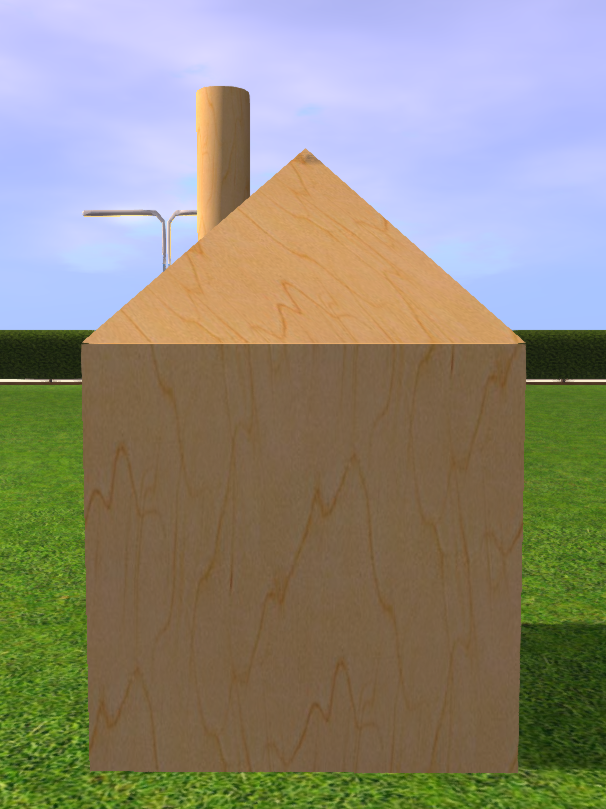
In this lesson you will learn to build your first house, which includes a roof and a chimney. At this point, your house will not include an entrance to it but will allow us to get to know the first steps in creating virtual worlds. Next we will learn how to build a house with entrance and division into rooms. In this lesson you will create a house as shown in the following picture.
בניה ראשונה
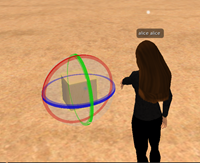
First step – creating a cube
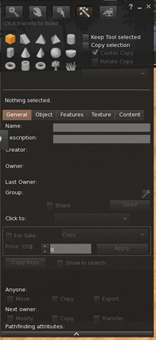
Create Menu
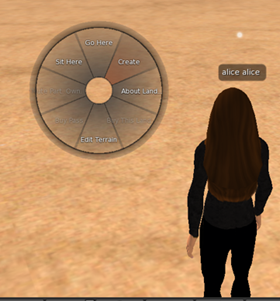
To build in the world, enter the create menu by pressing the right mouse button on the ground and then press CREATE (you can also press CTRL + B).
The menu includes a variety of functions for creation. At this point we will select the cube shape to get started
With one click on the ground next to you, the object (shape) will appear. Each click will create a cube, so be sure to click only once.
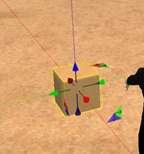
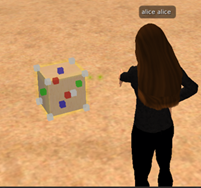
Moving the object
Using the colored arrows you can move the object in three directions in 3D perception (depth, width, height). Press the desired arrow direction (note that it becomes bold in a lighter color), and by pressing it continuously you will move the object.
Rotate the object
Long press the CTRL button to rotate the object. Place the mouse cursor on one of the colored circles and press and hold as you move the mouse to rotate the shape.
Resize the object
With a long press on the CTRL + SHIFT buttons the arrows will become dots in the corners of the shape. With them you can resize the shape.
At this point you can only edit objects created by you. Make sure that the object is in edit mode (the colored arrows appear on it) if the object is not in edit mode – right-click on the object and after pressing the EDIT button the edit mode will be activated again
Now make a 2-meter cube approximately, be sure to work next to your avatar to maintain the proportions of the shape. The colored beam coming out of my avatar shows those around me what object I am currently working on.
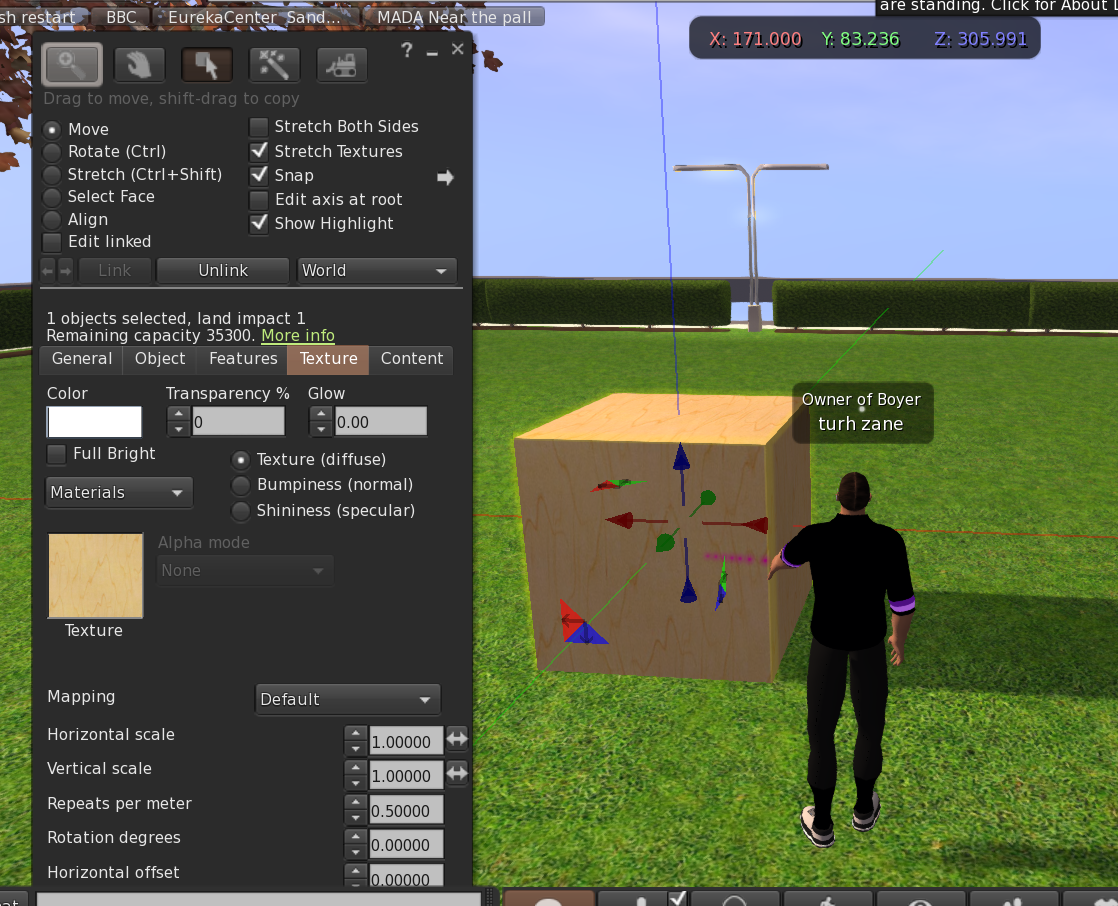
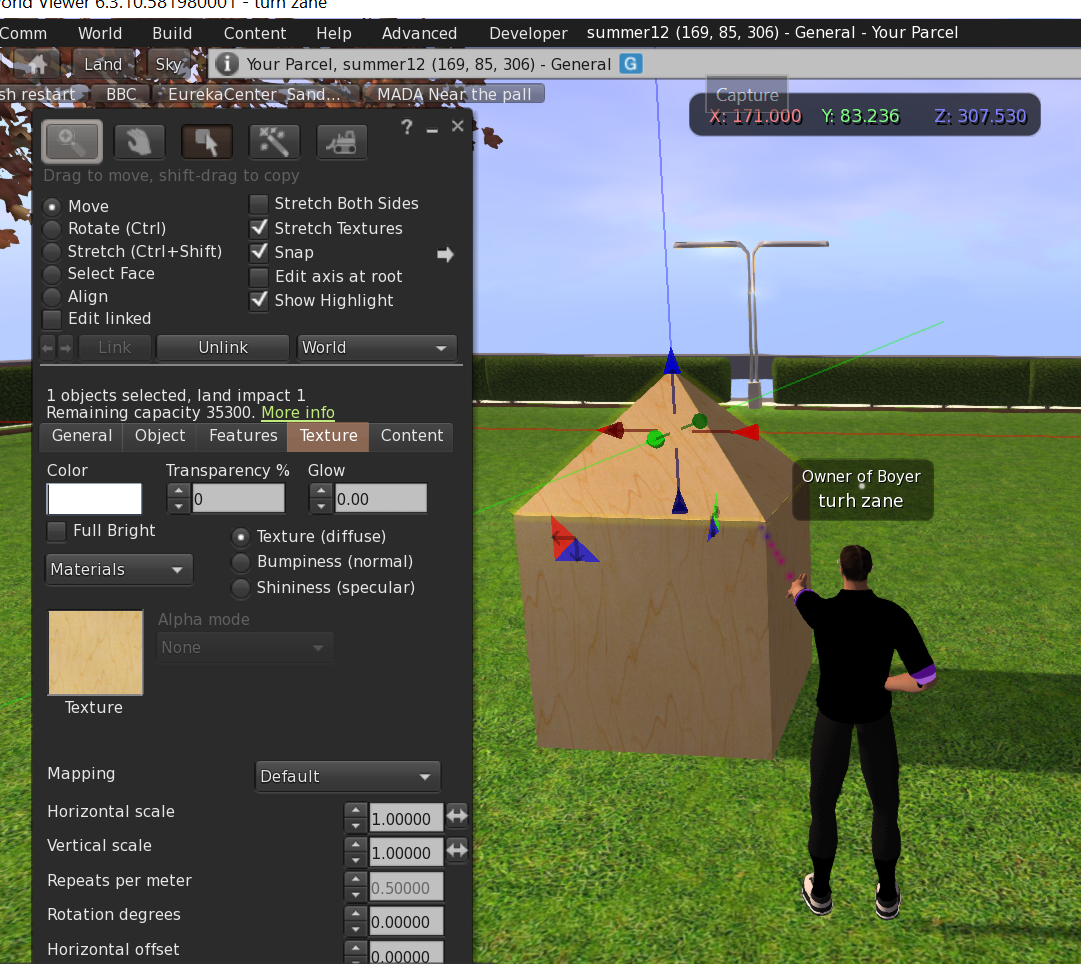
Second Step- The roof
We will repeat the creation process and this time we will choose the shape of the pyramid, place it on top of the shape of the cube. You can return to the creation menu by selecting the magic wand icon at the top of the menu.
Note that sometimes in order to be precise in the location of the roof it is necessary to look at the construction from several perspectives around. These views can be achieved by moving the Avatar or by changing the angle of the camera.
Third step- the chimney
In the third and final step to this chapter we will similarly add the chimney.